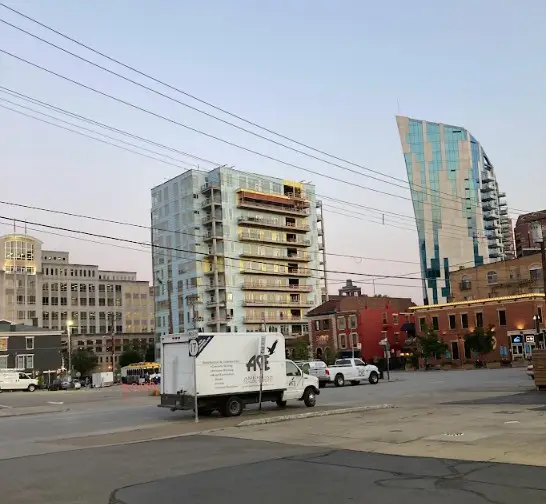
The Hayden Apartments building was a collaborative project between two major land development companies based in Cincinnati, OH; Urban Sites & Al Neyer. This was once a municipal building containing jail cells on the 9th and 10th floors, as well as, many other city offices on the floors below. This project added 2 stories to the building and refreshed building as a whole in order to convert the floors into apartment units.
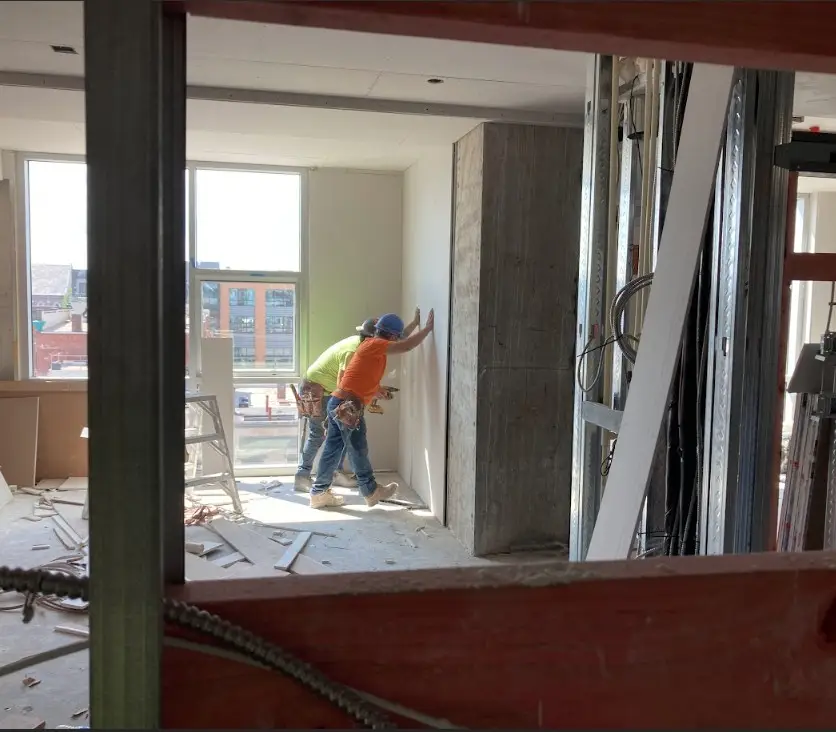
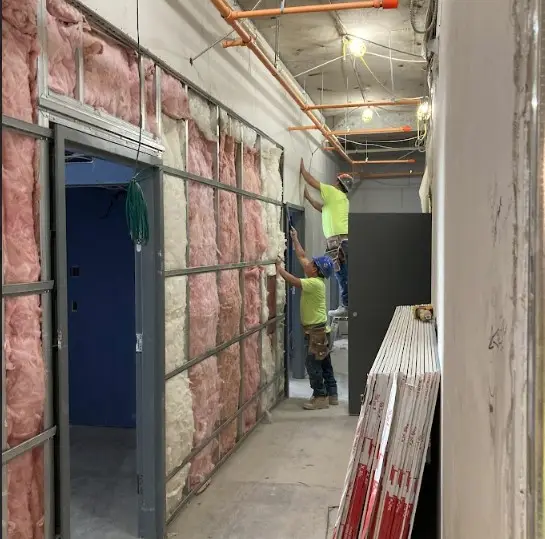
At the beginning of my Co-Op term, my main task was to take a head count of every contractor on site and how many people they brought to the site that day. This is in order to confirm man hours for job billing purposes. I also needed to take pictures of the progress throughout the building, totaling to 50+ pictures per day. Thus, at the end of my term I was left with lots of pictures of the building and the work being done inside and out. To the left and below are pictures of drywall going up towards the beginning of the project.
The building was constructed in stages, similar to how a music piece would be described as “a round”. Beginning with the top two floors, because they were new construction, then moving down to the 2nd floor (the 1st floor held offices and other building amenities) and then moving upward. The floors were constructed about two weeks apart.
The first phase involved MEP work, including running wire, plumbing, and HVAC work. Next the drywall went up and carpenters trimmed out walls and doorways. Finally, appliances and other finishes were added to the units.
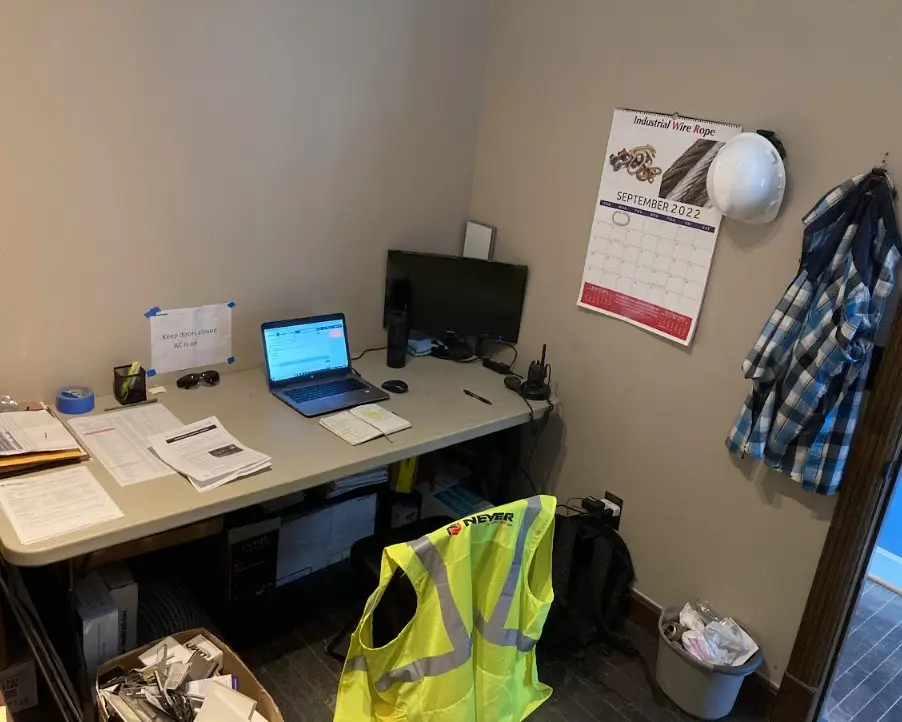
Pictured to the left is the office space I was provided with. This project was located in downtown Covington, KY; so, in place of a typical job trailer we used the first floor of a building across the street from the job site. Each day I would commute from Dayton to Covington and arrive on site before 7AM. We would then hold a daily meeting summarizing the goals for the day.
I spent more time on the job site than in my “office”, however, when in the office I was publishing submittals for project materials and RFIs for drawing corrections. One thing I learned working on this project is that the engineering drawings must match what is built nearly exactly in order for the owners to accept the work. So, red lining drawings and confirming project specifications was a big part of my job. Below you can see an example blueprint that was used.
Apartment Before
Apartment After
Above are before and after pictures of an example apartment unit in this building. As I mentioned earlier, it begins with MEPs going in, then drywall, carpentry and cabinetry, appliances and finishes. Finally, once the units are complete, the owner comes to the jobsite and creates a “punchlist” of items that need to be fixed before they will accept the units by marking them with blue tape. This is done similarly in the hallways also.
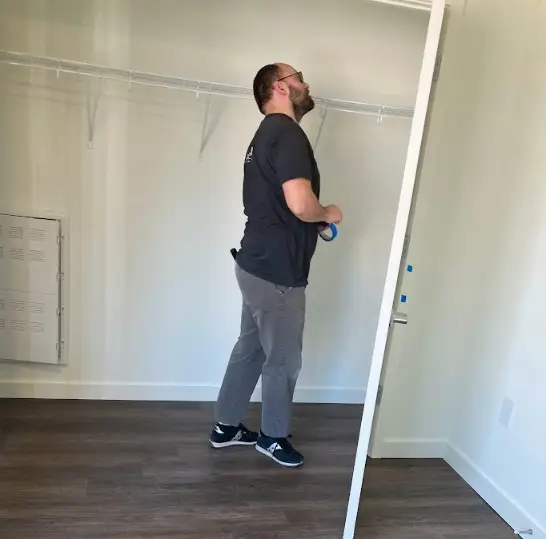
Pictured to the right is a sample from one of the punchlist walkthrough days. This would typically take all day on Friday to complete a whole floor. Once the punchlist is complete, the owner will accept the unit and then is in charge for all the utility expenses associated with the apartment unit. These are done floor by floor until the whole building has been turned over to the owner.
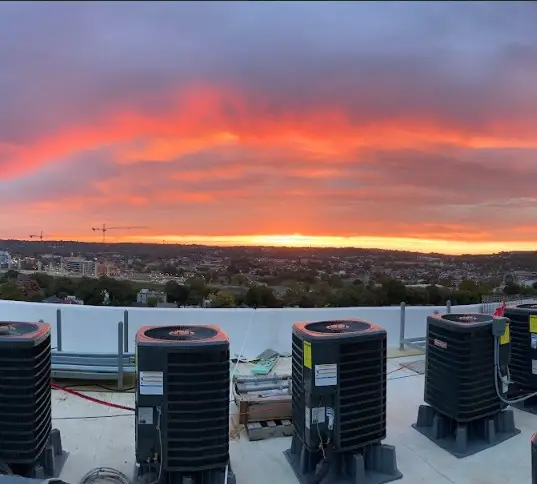
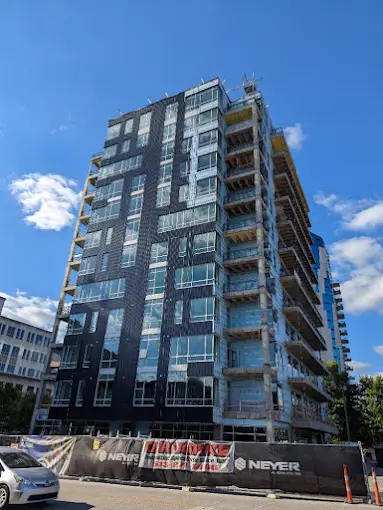
Overall, I learned a lot about the commercial construction process during this project. I learned how to manage multiple different contractors working in multiple parts of the building, ensuring they don’t overlap with each other, and also assuring the project gets done within schedule. Gantt charts are a huge part of this orchestration as they are a good visual tool to keep track of project progress. I was also fortunate enough to catch some beautiful sunrises from the rooftop during my time there, pictured below. Also pictured below is the final exterior facade of the building during the time I was involved. I was not there for the beginning or the end of the project, but during my time, major strides were made on both the exterior and interior of the building.